We are excited to announce a major new feature for ProjectionHub – Google Spreadsheet Integration.
With this new integration, users will get the best of both worlds:
- The flexibility of a spreadsheet
- The ease of use of ProjectionHub to help ensure your financial projections are bank and investor ready
Why Use Google Sheets Integration with ProjectionHub
A spreadsheet is often the best way to develop an assumptions based, customized financial model for your specific business. Over the years we have helped create 100’s of customized financial models for various startups and small businesses using a spreadsheet that may have 1,000’s of assumptions. The problem is that you need to integrate those assumptions into an integrated financial model that will allow you to create projected income statements, cash flow statements and balance sheets that are banker and investor ready.
Our new Google Sheets Integration will allow you to do all of your customized assumptions for your business in a Google Sheet and then import your revenue projections directly into ProjectionHub. ProjectionHub will then format your projected financial statements properly and allow you to download a finished set of projections so that you don’t have to worry about breaking your spreadsheet template.
How to Use Google Sheets Integration
So here is how to use Google Sheets within ProjectionHub.
1. Sign up for a ProjectionHub account and add your Business Info
2. Select a Business Model that best fits your company.
In this example I will add a Mobile App Business Model
 3. Add Revenue
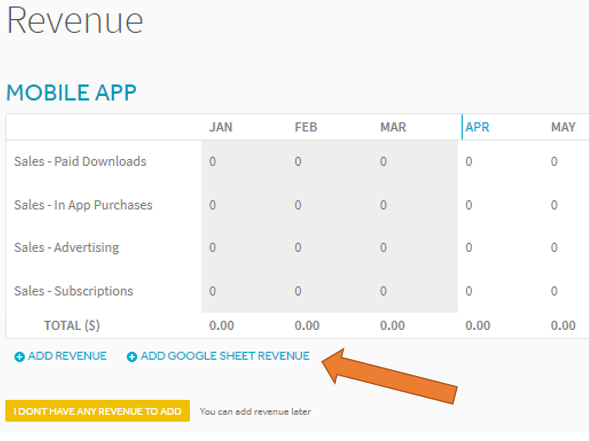
If your business model has a Google Sheet Template you will see a button that says “Add Google Sheet Revenue” which means this feature is enabled for your business model. If we don’t have a template for your business model yet, please email support@projectionhub.com to let us know that you would like us to add a Google Sheet Template for your business model and we will add a template ASAP.
4. Connect your Google Account
If you have not yet connected your Google Account, when you click “Add Google Sheet Revenue” you will be redirected to connect your Google Account. Don’t worry, by connecting your Google Account you are only giving us the ability to add the Google Sheet Template to your Google Drive account so that you can work on customizing your projections in the Google Sheet.

Then you will get to select an existing Google Account that you would like to connect.

5. Continue Adding Revenue
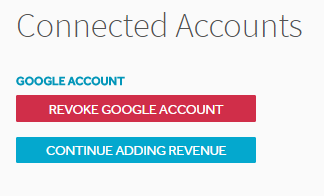
Next you will want to click “Continue Adding Revenue” to bring you back to the Revenue page. Also, note that you can always come back to your Connected Accounts page to Revoke Google Account Access.
6. Click “Add Google Sheet Revenue” Again
Now that you have connected your Google Account you can click “Add Google Sheet Revenue” again and it will add your Google Sheet Template.

7. Take a Sip of Coffee – It May Take 10 Seconds to Add your Sheet

8. Make sure Popup’s aren’t Blocked
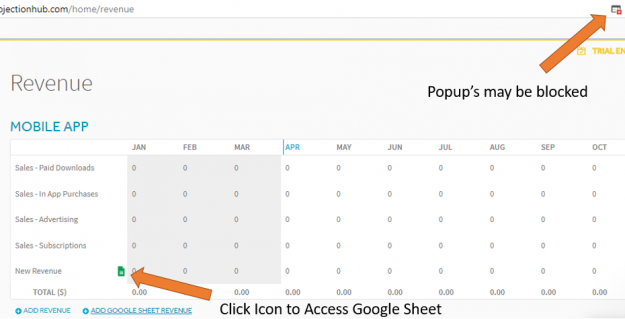
You should now see a new row called “New Revenue” with a Google Sheet Icon next to it. Click the Icon to open your Google Sheet template, and make sure that Popup’s aren’t blocked. In Google Chrome there is a little box in the top right corner that you can click to unblock popup’s so that you can view your Google Sheet Template.
9. Customize your Revenue Projections in the Google Sheet Template
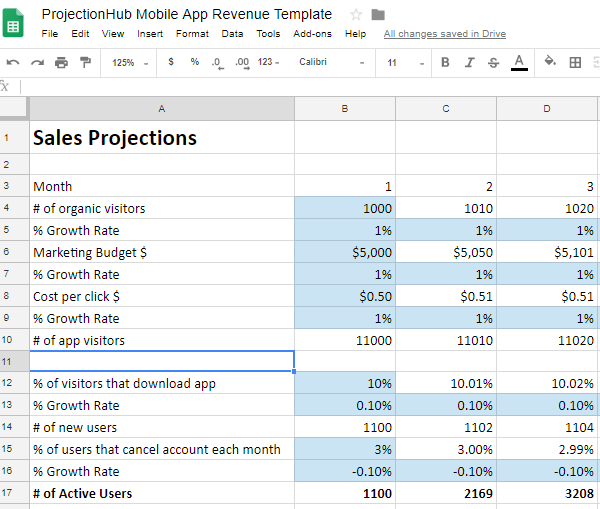
You will see a template that we have created to help you develop your revenue projections. Every cell that is highlighted in blue is an assumption that you can change. So in this example you will see things like website visitors, conversion rates to app downloads, user cancellation rates, subscription revenue, ad revenue etc.
You can customize the “Data Sheet” tab in the template as much as you want for your specific model.
10. Don’t Break the Integration!
You will need to be careful not to break the integration. The Row titled “Total Revenue” on the “Data Sheet” tab flows into tabs Year 1, Year 2, Year 3, Year 4 and Year 5. Ultimately this is what is imported into ProjectionHub, so you can customize anything you want in the sheet, BUT please make sure that your final revenue projections are in the Total Revenue row.
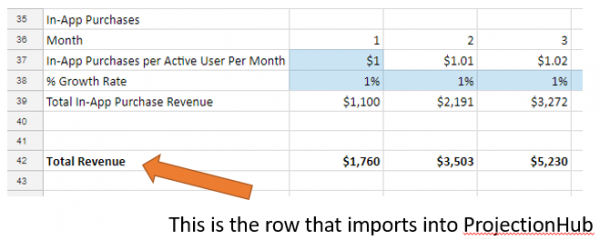
11. Import your Google Sheet into ProjectionHub
Now back in ProjectionHub, hover over the left of your new Revenue Row and you will see 3 dots that will give you a menu option to “Import Google Sheet” Once you click to Import ProjectionHub will pull your revenue numbers from your customized Google Sheet.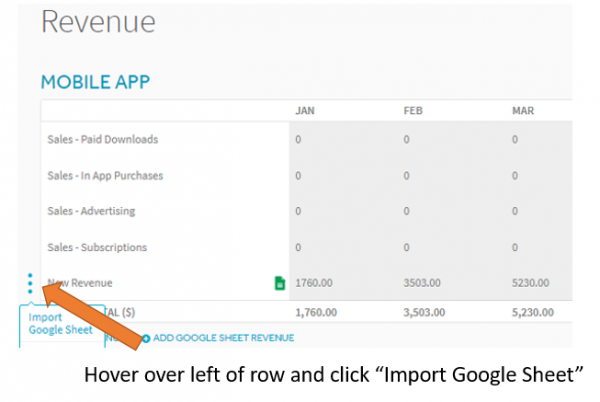
12. Rename your Revenue Line Item
You can now rename your revenue line item to whatever you want, and then add an additional Google Sheet for an additional Revenue Line Item if you would like.
13. Need help?
If you need some help, please reach out to support@projectionhub.com for technical questions, or if you would like us to help you develop your custom revenue model, we do offer consulting services which you can request a quote for here.